
When it comes to achieving a beautiful, long-lasting paint finish, many homeowners and property managers focus on choosing the right paint color, type, or brand. While these factors are important, one often overlooked element is surface preparation. Properly preparing the surface before painting is crucial for ensuring your paint adheres well, resists peeling, and withstands the test of time. In fact, surface preparation can be the difference between a paint job that lasts for years and one that requires frequent touch-ups or complete repainting.
In this comprehensive guide, we’ll explore how surface preparation influences the durability of your paint job, the steps involved, and why investing time in this process can save you money and frustration in the long run.

The Importance of Surface Preparation
Think of your painted surface as a canvas; if the canvas is dirty, greasy, or uneven, the paint application will not be smooth or durable. Surface preparation acts as the foundation for a successful paint job. It ensures proper adhesion, prevents issues like peeling and cracking, and enhances the overall appearance.
Poor surface preparation can lead to:
- Peeling or flaking paint: Without proper adhesion, paint can lift away from the surface over time.
- Uneven color or finish: Imperfections remain visible, leading to an unprofessional look.
- Premature deterioration: Dirt, grease, or moisture trapped under the paint can cause early failure.
- Costly rework: More frequent repainting means increased expenses and effort.
Therefore, investing effort in preparing your surface correctly is essential for maximizing the lifespan and quality of your paint job.
How Surface Preparation Affects Durability
- Improves Adhesion
The primary goal of surface preparation is to ensure that the paint adheres firmly to the substrate. Surfaces that are dirty, greasy, or glossy create barriers that prevent proper bonding. For example, gloss or semi-gloss paint residues can repel new paint layers. By sanding, cleaning, or etching the surface, you remove these barriers, allowing the new coat to grip tightly and last longer.
- Removes Contaminants
Dirt, dust, mold, mildew, and chalking paint can all compromise the integrity of a new paint layer. If these contaminants are not thoroughly cleaned, they can cause peeling or mold growth underneath the paint, leading to health issues and structural damage. Proper cleaning with appropriate solutions (like trisodium phosphate or specialized cleaners) ensures a clean surface that promotes durability.
- Eliminates Flaking and Loose Paint
Existing peeling or flaking paint must be scraped or sanded off. Applying new paint over loose material will inevitably result in further peeling, wasting time and resources. Properly removing loose paint creates a stable surface that provides a solid base for the new coat.
- Repairs Surface Imperfections
Cracks, holes, and rough patches can weaken the paint’s bond and create points of entry for moisture. Filling these imperfections with suitable patching compounds and sanding smooth prevents future deterioration and enhances the overall durability of the finish.
- Controls Moisture and Prevents Future Damage
Moisture is a leading cause of paint failure, especially on exterior surfaces. Proper preparation includes checking for and addressing moisture issues, such as leaks or high humidity, before painting. Applying a moisture-blocking primer or sealant can significantly extend the life of your paint.
- Ensures Proper Surface Texture
A rough or uneven surface can trap air and impede adhesion, while a very smooth surface might require sanding to create a better key for the paint. Achieving the right texture through sanding or etching ensures the paint bonds uniformly, reducing chances of premature failure.
Key Surface Preparation Steps
To maximize the durability of your paint, follow these essential preparation steps:
1. Clean the Surface Thoroughly
Remove dirt, dust, grease, mold, and mildew using appropriate cleaning agents. For exterior surfaces, a power washer can be effective, but avoid over-saturating or damaging the substrate. For interiors, use mild detergents or specialized cleaners.
2. Remove Loose or Peeling Paint
Scrape or sand away any flaking paint. Use a putty knife, wire brush, or power sander depending on the extent of the peeling. Ensure all loose material is eliminated for a firm bonding surface.
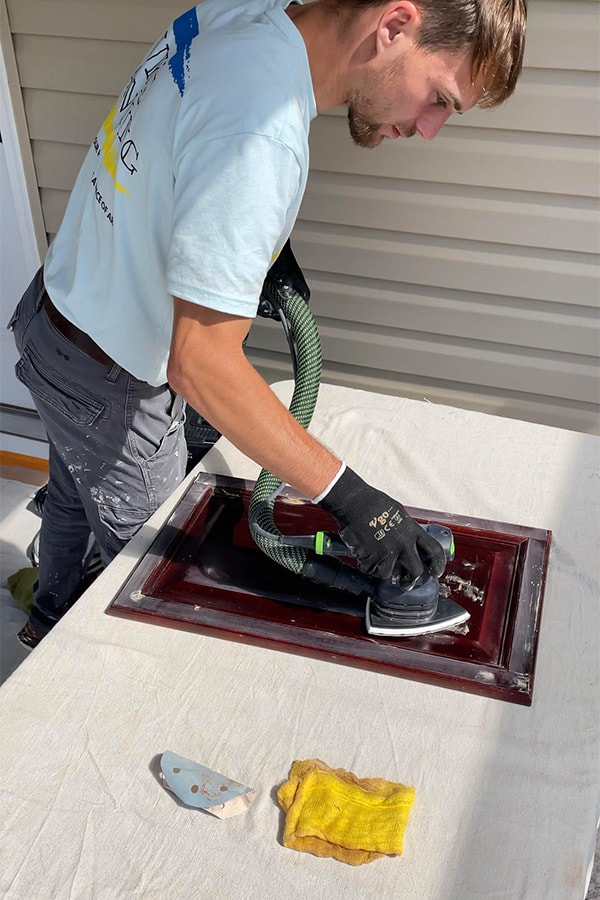
3. Sand the Surface
Lightly sand glossy or smooth surfaces to create a porous texture that promotes adhesion. Use fine-grit sandpaper and feather the edges of existing paint to blend it with the new surface.
4. Repair Damages
Fill cracks, holes, and dents with suitable patching compounds. Once dry, sand smooth to ensure an even surface.
5. Prime the Surface
Applying a high-quality primer suited for your surface and paint type can enhance adhesion, block stains, and prevent bleed-through. Primer is especially important on bare wood, new drywall, or repaired areas.
6. Address Moisture Issues
Ensure the surface is dry and free of moisture. For exterior projects, check for leaks or high humidity; consider using moisture barriers or sealants if needed.
The Long-Term Benefits of Proper Surface Preparation
Investing time and effort into surface preparation yields substantial benefits:
- Enhanced Longevity: Properly prepared surfaces can extend the lifespan of your paint by years, reducing the frequency of repainting.
- Cost Savings: Fewer repaint cycles mean less money spent on materials and labor over time.
- Better Appearance: A smooth, clean surface results in a professional-looking finish that maintains its beauty longer.
- Protection Against Damage: Proper preparation reduces the risk of moisture infiltration, mold growth, and structural deterioration.
Common Mistakes That Undermine Durability
Even with good intentions, some common mistakes can compromise your paint job:
- Skipping cleaning or simply wiping the surface instead of thorough washing.
- Painting over dirty, greasy, or glossy surfaces without proper sanding or priming.
- Neglecting repairs before painting, leaving cracks or holes unaddressed.
- Applying paint in extreme weather conditions, such as high humidity or direct sunlight.
- Using incompatible primers or paints with the surface material.
Avoiding these pitfalls by adhering to proper surface prep practices will significantly improve your results.
Final Thoughts
Surface preparation is the unsung hero of successful, durable paint jobs. It might seem tedious or time-consuming initially, but the long-term benefits are undeniable. A well-prepared surface ensures that your paint adheres better, resists peeling, and withstands environmental stressors, saving you money, effort, and frustration down the line.
Remember, the quality of your surface preparation directly correlates with the longevity and appearance of your finished paint. Whether you’re tackling a small interior wall or an entire exterior building, investing in thorough surface prep is the smartest step toward a beautiful, long-lasting finish that looks great for years to come.
